The magic of watching Elite playing itself
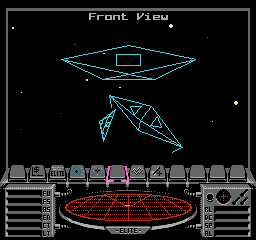
If you leave NES Elite sitting idle on the Start screen for long enough, then the game will automatically switch to the combat demo... and it will then proceed to play against itself, shooting down the three enemy ships without any human interaction at all:
The computer pilot behaves a little differently depending on which language is currently chosen, so the combat aspect of the auto-play demo has a different flavour in English, German and French. All three ships get taken out pretty quickly, whichever language is chosen, and then the combat demo finishes and we end up at the title screen.
It's fun to watch, but the auto-play system isn't finished, not by a long way. It now embarks on a grand tour of the game itself, doing the following steps completely automatically (and only stopping if a button is pressed on one of the controllers):
- Show off the Equip Ship screen
- Buy a bunch of cargo
- Launch
- Use the charts to hyperspace to Zaonce
- Use in-system jumps to get close to the planet
- Wait for the space station to appear
- Switch on the docking computer and dock
- Sell the cargo we bought
- Buy some fuel
- Launch again
- Look at the Status Mode screen
- Target a missile
- Lock our missile onto... wait for it... the space station (!)
- Fire the missile
- Sit there until Vipers come and blast through our shields and our energy levels start to deplete
- Switch to the Status Mode screen to see the commander image flashing red
- Enjoy the Game Over screen
- Return to the title screen and terminate auto-play
It's quite a thrill ride! Let's see how it all happens.
Triggering the auto-play demo
-----------------------------
The auto-play system is triggered by the ChooseLanguage routine. If it sits idle for a specific amount of time without any buttons being pressed, then it calls the SetDemoAutoPlay routine to enable auto-play (the PAL version waits for longer than the NTSC version before jumping into auto-play, incidentally). SetDemoAutoPlay then initialises the demo universe via SetupDemoUniverse and sets bit 7 of the autoPlayDemo variable.
When bit 7 of autoPlayDemo is set, the NMI handler calls the AutoPlayDemo routine every VBlank (so that's 50 times a second on a PAL system, or 60 times a second on NTSC). The AutoPlayDemo routine is the heart of the auto-play system, and it "presses" keys from a set of tables to play the game without needing any human interaction. Let's see how it works.
There are four tables containing key presses that get automatically applied when the combat demo is auto-playing. When the combat demo auto-play starts, the first table to be used for key presses is language-dependent, with either autoPlayKeys1_EN, autoPlayKeys1_DE or autoPlayKeys1_FR being chosen for the first batch of auto-play keys, depending on the currently chosen language. If no language has been chosen yet, then it uses the currently highlighted language on the Start screen. Once the key presses from the relevant language table have been applied, we move on to the key presses in the autoPlayKeys2 table, irrespective of which language is chosen.
Broadly speaking, the three language-dependent autoPlayKeys1 tables contain the combat part of the auto-play demo, while the autoPlayKeys2 table shows off the game's features (though the latter does have the last few bits of combat action at the start).
All of the autoPlayKeys tables contain sequences of key presses that are "pressed" by the AutoPlayDemo routine. This is done by rotating bits into the controller variables, so we rotate a set bit into bit 7 of controller1Right to "press" the right button, or we rotate a set bit into bit 7 of controller1A to "press" the A button (and, to keep things in sync, we also rotate zeroes into bit 7 of all the other controller variables). This is exactly the same process that is used by the controllers in normal flight, so the AutoPlayDemo routine really does fly the ship in the same way as a human player would, it's just automated (see the deep dive on bolting NES controllers onto the key logger for more on how the controller variables work).
Before we look at the contents of the autoPlayKeys tables, it's worth noting that the combat demo is always initialised with a fixed set of random seeds, courtesy of the FixRandomNumbers routine, which is called by the PlayDemo routine when running the combat demo. This means that any random behaviour is in fact totally predictable, so if we fly our ship in a fixed manner (such as in the auto-play mode), then everything will always pan out in the same way. This is how the auto-play mode manages to kill the enemy ships every time - because the combat demo universe is not actually random.
Auto-play key presses
---------------------
As mentioned above, the AutoPlayDemo routine is called every VBlank while bit 7 of autoPlayDemo is set. The NMI handler then auto-plays the combat demo by "pressing" buttons automatically, taking those button presses from auto-play commands in the relevant autoPlayKeys table. The process starts with the auto-play commands in the chosen language table (autoPlayKeys1_EN, autoPlayKeys1_DE or autoPlayKeys1_FR), and then moves on to the auto-play commands in the autoPlayKeys2 table.
The AutoPlayDemo routine processes one command from the autoPlayKeys table in each VBlank. It works by fetching a byte from the autoPlayKeys table and then interpreting that byte as a command (and, depending on the command, it can also process up to three of the following bytes).
The list of auto-play commands is as follows:
| Command | Action |
|---|---|
| $xx $yy (0 <= $xx <= $7F) | Press the buttons in $xx for $yy VBlanks |
| $80 | Terminate auto-play |
| $xx ($81 <= $xx <= $BF) | Do nothing for $xx * 4 repetitions (ignoring bit 7 of $xx in this calculation) |
| $C0 | Switch to the autoPlayKeys2 key set and start processing its key presses in the next NMI |
| $C1 $xx $yy $zz | Press the buttons in $xx while ($zz $yy) <> 0 |
| $C2 $xx $yy $zz | Press the buttons in $xx while ($zz $yy) = 0 |
| $C3 $xx $yy $zz | Press the buttons in $xx while bit 7 of ($zz $yy) is set |
| $C4 $xx $yy $zz | Press the buttons in $xx while bit 7 of ($zz $yy) is clear |
| $C5 | Press the Start button and do nothing for 22 VBlanks |
The buttons that get "pressed" in the above commands are encoded in a single "button-press byte", so when we say "press the buttons in $xx", $xx contains the details of which buttons we should press. There is one bit for each button, with a set bit indicating that the button should be pressed, so bits 0 to 6 of $xx determine the button or buttons that get pressed.
The bits are as follows:
- Bit 0 = right button
- Bit 1 = left button
- Bit 2 = down button
- Bit 3 = up button
- Bit 4 = Select button
- Bit 5 = B button
- Bit 6 = A button
Bit 7 is always clear in button-press bytes so the value is between 0 and $7F, which is then interpreted as a button-press byte (having bit 7 set means the byte is a command rather than a button-press byte, as shown above). That's also why the Start button has its own command ($C5), as it can't use bit 7 in the button-press byte. Given the above, when expressed in binary, button-press bytes are always in the form %0ABSUDLR, where "L" is the left button, "R" the right button, "S" is the Select button, and so on.
Let's look at some examples. The following auto-play command does nothing for 8 * 4 = 32 VBlanks:
EQUB $88
This auto-play command presses the down and B buttons (%00100100) for 31 VBlanks to reduce our speed:
  EQUB %00100100
  EQUB 31
This auto-play command presses the right and B buttons (%00100001) for 18 VBlanks, which moves the icon bar pointer to the right:
  EQUB %00100001
  EQUB 18
This auto-play command presses the up button (%00001000) while bit 7 of MSTG is set, so we pull up until our missile locks onto a target:
  EQUB $C3
  EQUB %00001000
  EQUW MSTG
In this way the combat demo plays out according to the script of auto-play commands, and because the random number seeds have been set to a fixed value, the whole thing pans out as planned, with the three enemy ships meeting a fiery end.
Interestingly, the auto-play system doesn't work properly in the NTSC version. This is because the timings in the auto-play tables rely on the fact that 50 commands are processed every second, via the NMI handler. The NTSC NES calls NMI 60 times a second, and that's enough to cause chaos. As a result, the auto-play combat demo goes on and on, as the ships don't get destroyed.
The auto-play algorithm
-----------------------
For reference, the AutoPlayDemo routine interprets auto-play commands using the following algorithm, where the bytes in each command are numbered from 1 to 4:
- If byte #1 has bit 7 clear:
- Fetch the next byte (let's call it byte #2)
- Repeat the button presses in byte #1 for byte #2 repetitions
- If byte #1 has bit 7 set:
- If byte #1 = $80, terminate auto-play
- If byte #1 has bit 6 clear:
- Do nothing for 4 * byte #1 repetitions (ignoring bit 7 of byte #1 in this calculation)
- If byte #1 has bit 6 set:
- If byte #1 = $C0:
- Switch to the autoPlayKeys2 table and start processing commands from there in the next VBlank
- Otherwise byte #1 is of the form $Cx where x is non-zero, so:
- Fetch the next three bytes (let's call them bytes #2 to #4)
- Set addr(1 0) = (byte #4 byte #3)
- If byte #1 = $C1:
- Repeat the button presses in byte #2 in each subsequent VBlank while addr(1 0) <> 0, and then continue processing with the command after byte #3
- If byte #1 = $C2:
- Repeat the button presses in byte #2 in each subsequent VBlank while addr(1 0) = 0, and then continue processing with the command after byte #3
- If byte #1 = $C3:
- Repeat the button presses in byte #2 in each subsequent VBlank while bit 7 of addr(1 0) is set, and then continue processing with the command after byte #3
- If byte #1 = $C4:
- Repeat the button presses in byte #2 in each subsequent VBlank while bit 7 of addr(1 0) is clear, and then continue processing with the command after byte #3
- If byte #1 = $C5:
- Press the Start button and do nothing for 22 VBlanks before continuing with the command after byte #1
- If byte #1 = $C0:
It's a simple structure, but when paired with the ability to wait for flight variables to hit certain values, it's surprisingly flexible.